Wish you could shoot shipwreck photos good enough to grace the pages of a dive magazine? Seasoned wreck photographer Jason Brown reveals his ‘go to’ tricks to help you shoot better wreck photos.
BARDOPHOTOGRAPHIC
Give your shipwreck photography
a boost with these tips...
Shipwrecks are nothing more than scrap metal, right? And yet we divers cannot get enough of them - destinations like Malin Head, Chuuk Lagoon and Bikini Atol continue to attract divers from across the globe desperate to sate their lust for rust.

Which raises an obvious question - what is it about shipwrecks that make them such a source of fascination? Maybe it’s the promise of lost treasure buried deep with their holds or simply the surreal spectacle of exploring something so alien to the marine environment that ended its life in such a dramatic and unexpected way.
Key Information
Author:
Jason Brown
Publication Date:
June 2021
Publication:
Feature catagory:
Photography
Photo Gallery:

This feature and all images are copyright © Jason Brown and may not be republished, reproduced or copied in any form without the express written permission of the author. This feature and all images are available to licence.
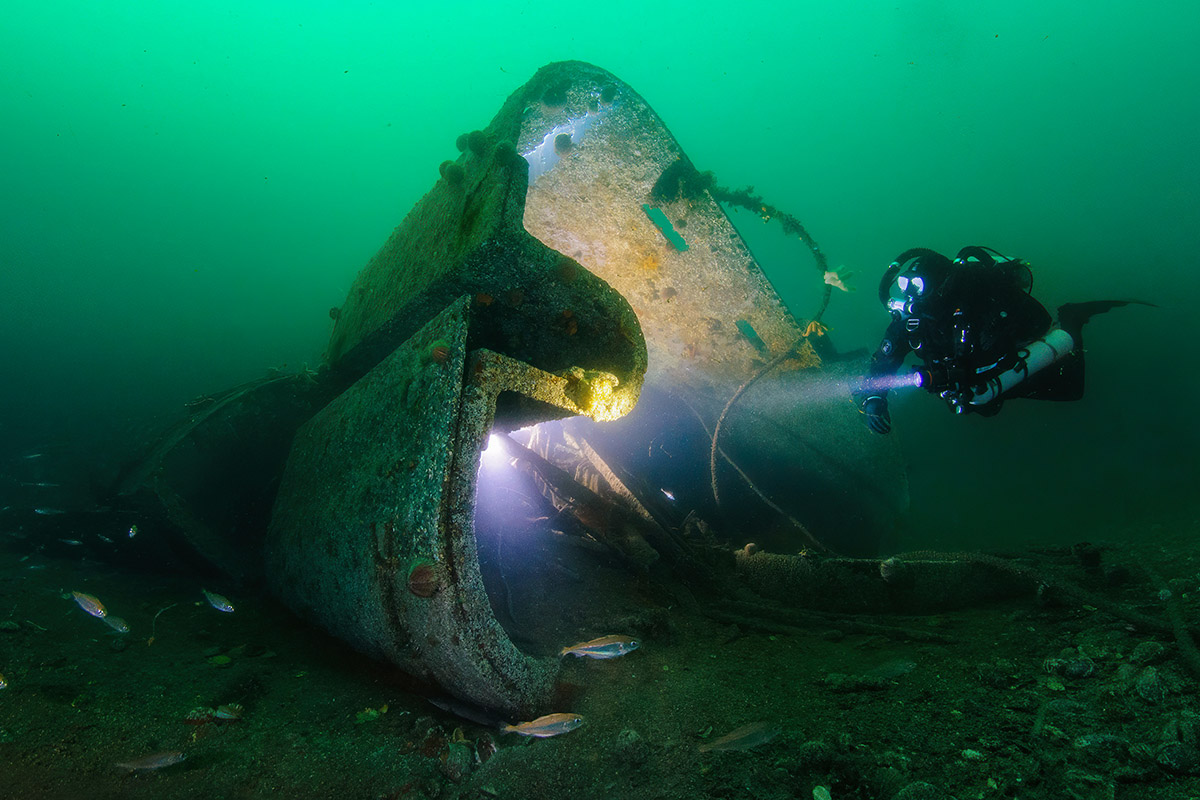
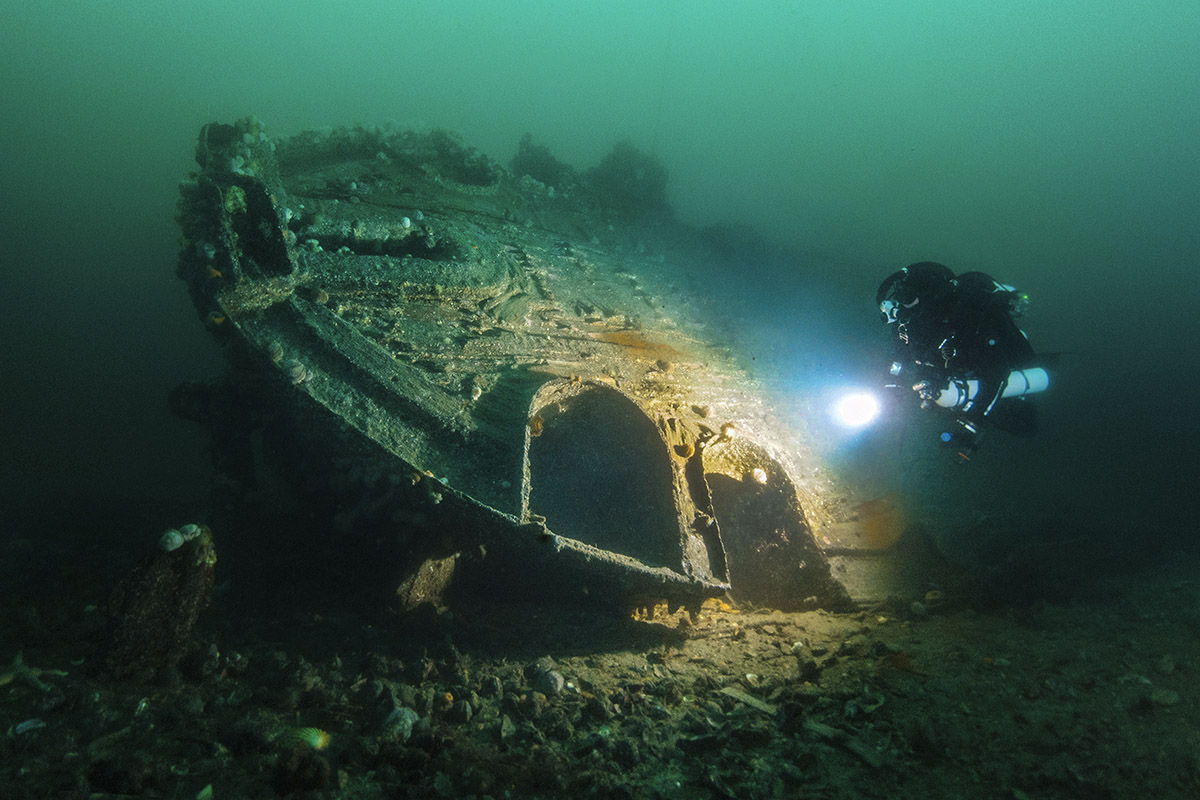
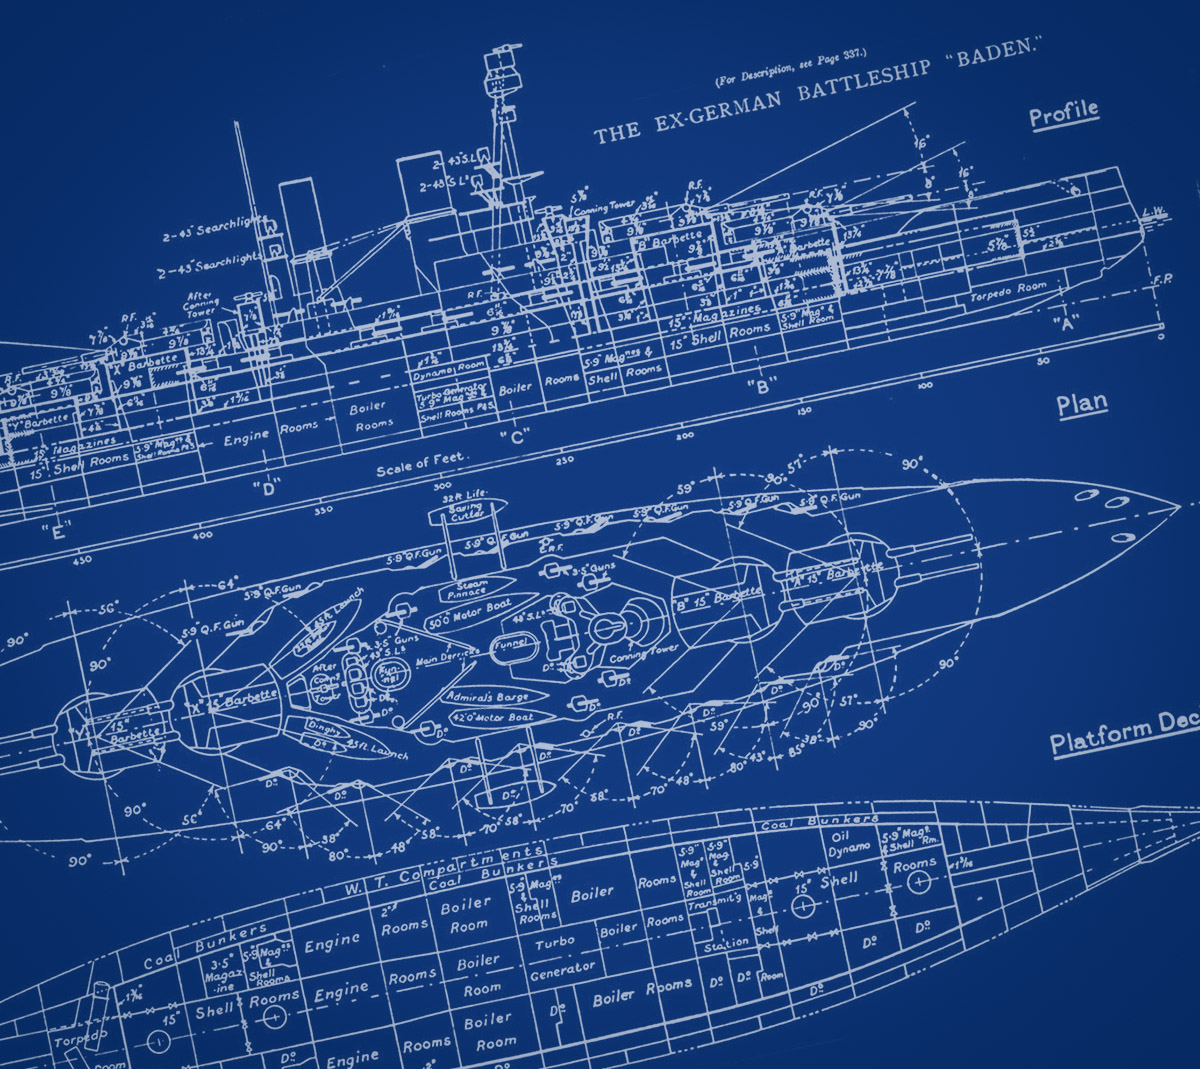
For me, it’s something far simpler – it’s the history of the wreck and the promise of the stories that they can reveal that fascinates me. Shipwrecks are far more than just scrap metal on the sea bed – they’re time capsules that tell a story of days gone by. Stories of maritime trade and adventure, the people that served and often died on them, and, of course, times of war and conflict between nations. Military wrecks are particularly fascinating as they often bore witness to some of history’s most dramatic events.

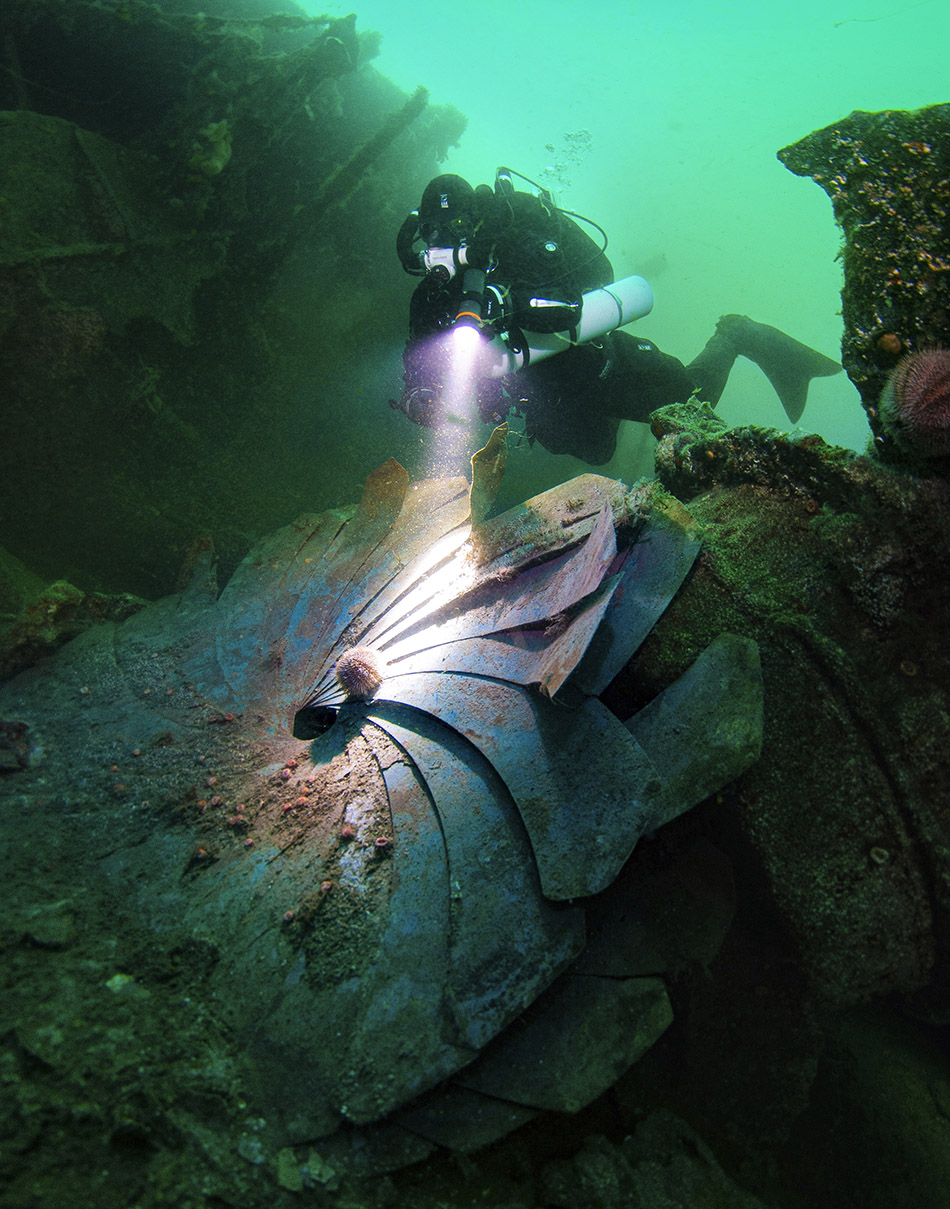
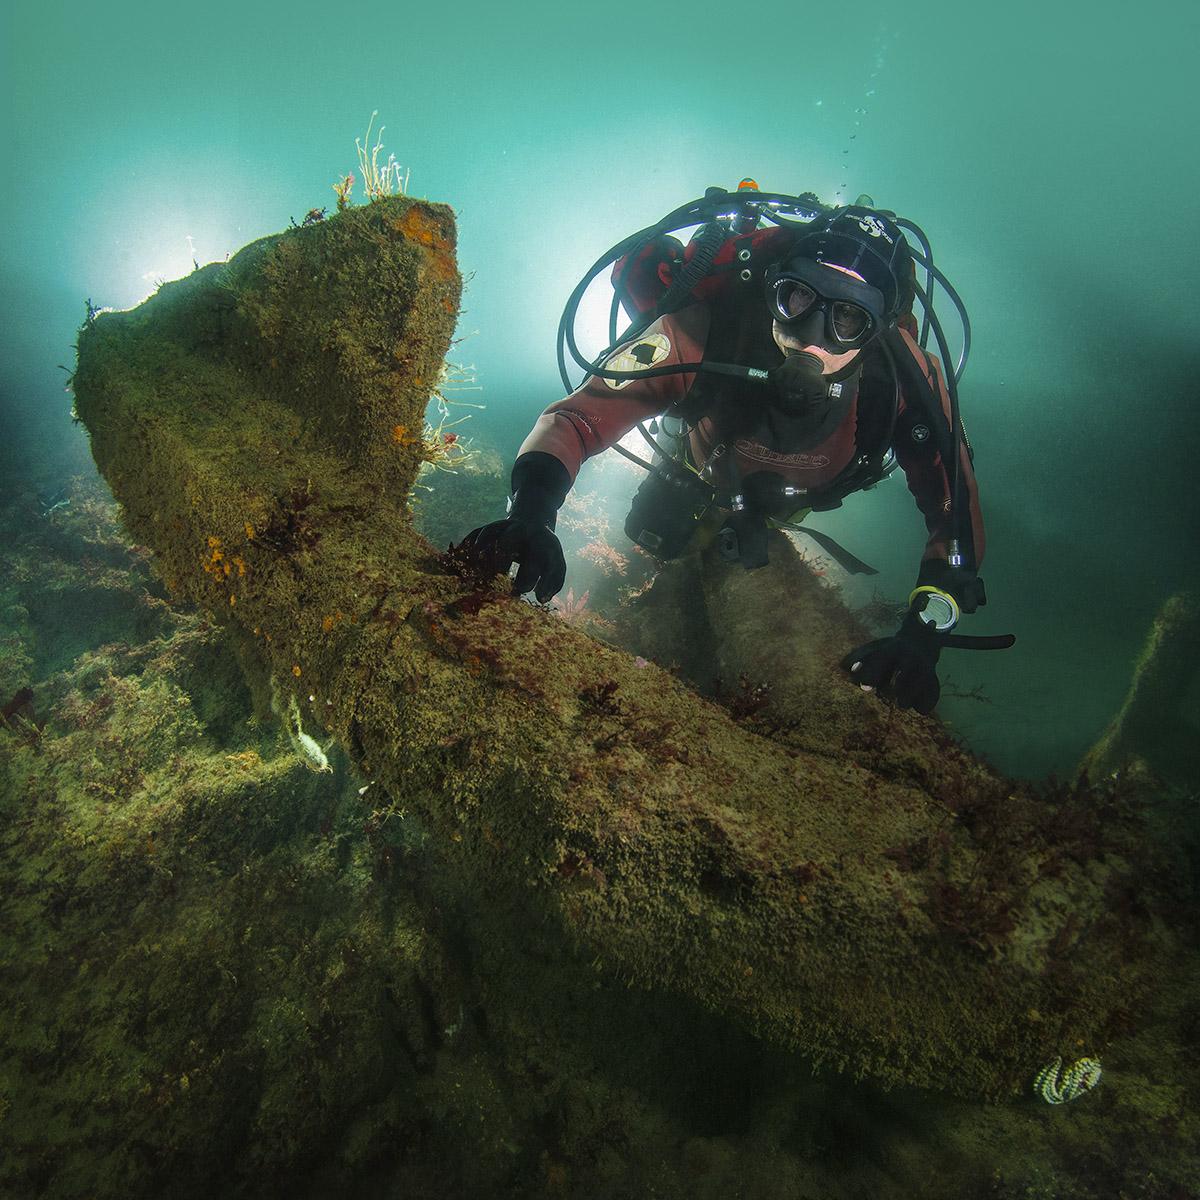
A good case in point are the shipwrecks of the German High Seas fleet now resting at the bottonm of Scapa Flow in the Orkney Islands. On the 21st June 1919, the Orkney Islands bore witness to a truely shocking moment in history as fifty-two ships under the command of Admiral Ludwig von Reuter were scuttled as the British Royal Navy looked on helplessly. Although most of the vessels that sank that day were subsequently salvaged, seven still remain to this day. As divers, we're privileged to visit these ghostly weapons of war still bristling with breach-loading guns of mammoth proportions. For those with the right gear and knowledge, they provide unrivalled opportunities to shoot eye-catching wreck photos fit to grace the pages of any magazine!

An invaluable teacher
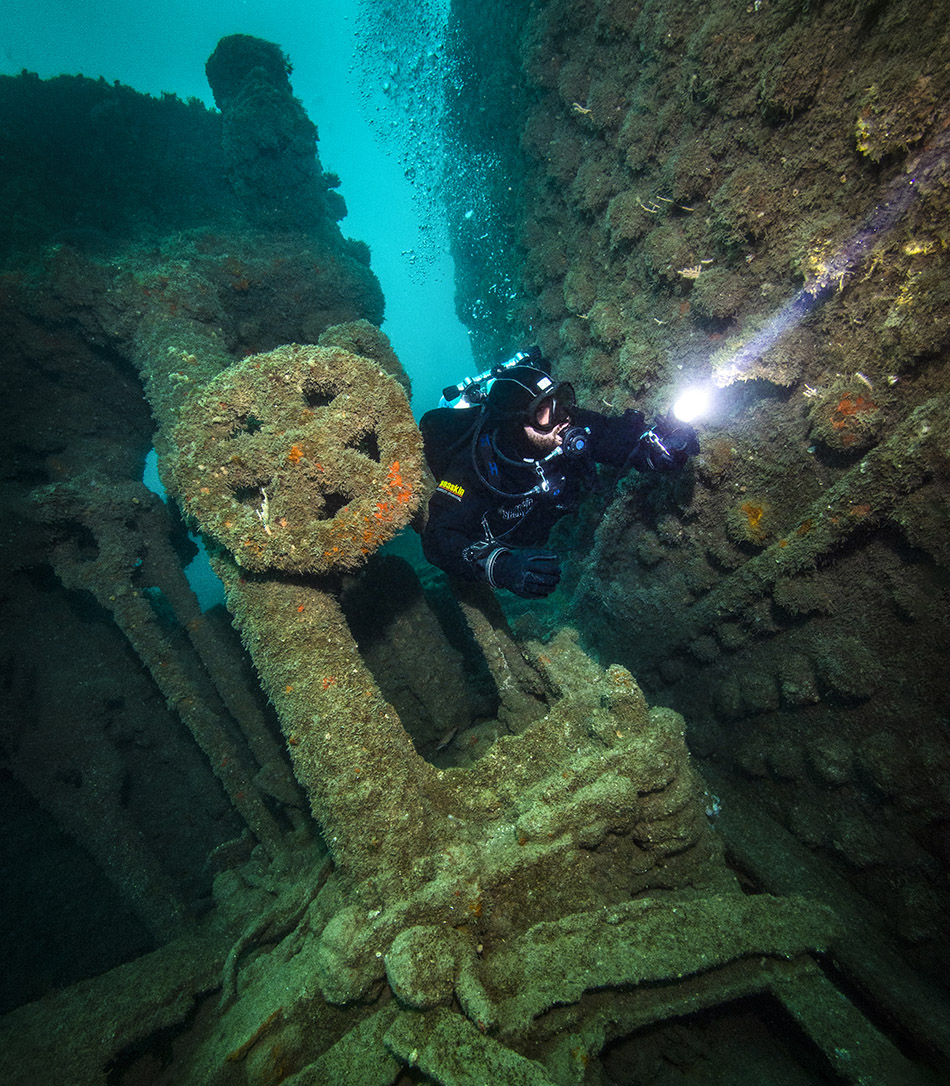
Of course shipwrecks also make great photographic subjects but, as many underwater photographers discover, shooting a decent wreck photo is a lot trickier than it may seem. Over the years I’ve been fortunate to dive and photograph shipwrecks across the globe and I’ve had more than my fair share of photographic failures. The mistakes we make can be our best teachers so never just discard them – instead, take time to look at what went wrong and think about how you could improve.

I’ll be the first to admit that I’ve learnt some invaluable lessons from the many shots that didn’t quite go to plan. Below I present ten golden nuggets of painfully-learnt advice to help you develop your skills as an underwater wreck photographer. Whilst I can't promise that you'll be the next UPY grand prize winner, I hope you find at least some of them genuinely beneficial...
"The mistakes we make can be our best teachers so never just discard them – instead, take time to look at what went wrong and think about how you could improve."
TIP #1 - Go wide!
It should be fairly obvious that a macro lens is perhaps not the best ‘weapon of choice’ to shoot great shipwreck images. By their very nature, shipwrecks tend to be very large subjects so choosing the right camera and lens combination is essential.

For best results, you want to use a digital SLR or mirrorless camera in a dedicated camera housing with an ultra-wide fisheye lens. A fisheye lens will give the widest possible field of view (FOV) which will allow you to cram as much of the wreck into the frame without having to be so far away from the subject that it becomes lost in the murk. Most modern cameras can produce superb results underwater but try to go for one with great low light capabilities – being able to shoot at high ISO with minimal noise is invaluable in darker conditions.

Whilst a lot more limited in their capabilities, compact camera users can shoot great wreck photos too. Several companies produce ancillary ‘wet’ lens that can be attached to the front of a compact camera housing to give a considerable increase in coverage – the Inon UFL-165AD, for example, will deliver a 165 degree field of view and can be mated with a range of different cameras with the appropriate mount adaptor.
TIP #2 - Balance light sources...
One of the biggest challenges of shooting shipwrecks is lighting them – their sheer size is far beyond what even the most powerful strobe or video light can cover. Do not attempt to illuminate the entire wreck with your strobes – if you try, you will definitely fail as the 'fall off' of as the light from a strobe diminishes significantly over a surprisingly short distance, especially in poor visibility.

Instead, learn to compliment artificial lighting from your strobes with ambient light. Once mastered, balancing the two types of lighting can be highly effective as it allows you to portray the scale of the wreck and draw the viewer’s eye to specific features on the wreck.

Shooting with ambient light does have a couple of disadvantages though. Firstly, you have no control over the direction of light – you cannot move the wreck and you certainly cannot move the sun so you’ll have to pick the right time of day to get the light from the sun striking the wreck in the right place. Secondly, ambient light isn’t so easy to colour correct if you’re mixing it with light from your strobes – unless you’re shooting *very* close to the surface, white balancing for ambient and artificial light is nigh-on impossible – better to leave the ambient light as it is and colour correct the artificial light for best results.
"Do not attempt to illuminate the entire wreck with your strobes – if you try, you will definitely fail..."
"In temperate waters like those found in the UK and most of Northern Europe, that means bumping up the ISO, particularly at depth."
TIP #3 - Crank up the sensitivity...
This image of the stern of the SMS Karlsruhe in Scapa Flow is a perfect example of what can be achieved by cranking up the low light capabilities of your camera. Shooting a wreck using ambient light requires some adjustment of camera settings to get the optimal exposure.

In temperate waters like those found in the UK and most of Northern Europe, that means cranking up the ISO sensitivity, particularly at depth. You need a decent shutter speed to get a sharp image so start by setting this at an acceptable level – say 1/60th of a second – and then adjust your ISO and aperture accordingly until you get an acceptable exposure without strobe light. If you’re shooting with a fisheye lens, depth of field is less of an issue so you can get away with using a relatively open aperture like f/2.8.

How far you can push your ISO is dependent on your model of camera – modern DSLR and mirrorless cameras offer very good low-light performance but noise will increase the higher you go. Typically, I try to avoid pushing ISO above ISO 6400 on my Nikon system but other cameras – the Sony A7S ('S' for sensitivity) series, for example, offer even better high ISO performance by sacrificing resolution. That's not to say noise is a bad thing - a little bit of noise will add atmosphere and make a shot feel more natural.
"When viz and ambient light allow, back off and get as much of the wreck into the frame as you can."
TIP #4 - Convey a sense of scale!
Remember how you imagined a shipwreck when you were a kid? Most of us probably imagined an almost intact ship resting on the seabed with its masts still pointing towards the surface. Whilst the reality rarely matches this idealised image, some of the best wreck photos invoke these childhood memories by portraying a sense of sheer scale and recognition of the subject matter.

If you’re shooting in an environment with limitless visibility and strong ambient light, back off and get as much of the wreck into the frame as visibility will allow. Images like this really are the money shot and are very popular in diving magazines. They are almost always illuminated entirely by ambient light only so shooting in RAW and fixing colour casts in post-production is a must if you want to reveal whatever limited colour is available in the shot.

In darker, more temperate waters where visibility allows, you can achieve similar results by ramping up the ISO and strategically placing divers along the wreck to blast light towards key sections lost in shadow.

Such big shots aren’t always an option, of course, especially in more temperate waters where visibility may be more limited. Where visibility is limited, focus instead on signature features of the wreck to portray a similar (but naturally more limited) sense of scale and recognition.
TIP #5 - Always shoot in RAW
What image format does your camera shoot in? Unless you've dug deep into the menus, there's a good chance you're not getting the most out of your cameras. Most modern cameras are set by default to store images in JPEG format which is a compressed image format that loses much of the 'deep colour' information that your camera's sensor is capable of capturing.

To truely unlock the power of your camera to produce award-winning images, you need to shoot in RAW. Camera RAW files contain far greater ‘bit depth’ and give the greatest scope for post-shot adjustment as they record the unprocessed image data generated by your camera's image sensor. JPEG files, on the other hand, strip out and compress much of this 'deep colour' information, resulting in far less scope for editing adjustments.

If you want to shoot great wreck photos to rival the pros, you’ve got to shoot in RAW and learn how to use post-processing software like Adobe Lightroom. All professional underwater photographers shoot in RAW.

Shooting in RAW really comes into its own when shooting wreck photos as it’ll allow you to squeeze every last detail out of your images. Whether you’re pulling details out of the shadows or tweaking white balance to make those rusticles pop, a program like Adobe Lightroom will unlock a level of image quality and dynamic colour depth you’ll never achieve shooting jpegs.
TIP #6 - Off-camera lighting
If you really want to take your images to the next level, off-camera lighting is a great technique worth mastering. Instead of relying on ambient light to illuminate areas of the wreck that your camera strobes cannot reach, off-camera lighting allows you to illuminate background features using artificial light. It’s a great technique for ‘popping out’ areas of the background that you want the viewer to notice – a deck gun, for example – or for simply illuminating an area of a wreck that may be lost in shadow.

In some environments, off-camera lighting is a must. On deeper wrecks or those in more temperate waters, you may not have the luxury of strong ambient light – without off-camera lighting, much of the wreck maybe lost in the darkness. By strategically placing lights into the background of your shot, you can illuminate areas of the wreck that would normally be lost in the shadows. This technique works particularly well in silty environments as off-camera lighting doesn’t suffer from the same risk of backscatter as the strobes attached to your camera rig, allowing you to get creative without worrying about backscatter.

Off-camera lighting generally comes in two forms – big, powerful video lights or more conventional photographic strobes connected to an optical flash sensor. Video lights are the easiest to work with as they give immediate feedback and are often the best choice if you’re shooting deep wrecks where bottom time is at a premium. Strobes, however, produce more (and, in my opinion) better quality light but are trickier to set up. They also need to be used with an optical trigger that detects the flash from the strobes connected to your camera.
TIP #7 - Use back-lighting
If you’re shooting wreck photos with models then back lighting is another powerful technique that can really make your photos pop. To shoot an eye-catching image of a diver inside a shipwreck, you’ll want to separate the diver from the background. This is quite easy to do in clear, blue water but a lot trickier in an environment with very little ambient light. It’s even tricker when your model breaks the cardinal rule of photography – they dress all in black in a mostly dark environment!

To get around this problem, I will often attach a rear-firing strobe with an optical sensor to the back of my dive buddy. Kent Tooling here in the UK make a really useful little marine grade stainless plate with a 1” ball mount which you can strap to just about any rebreather or dive tank with a suitable cam band. The 1” ball mount lets you quickly and easily attach a strobe to the back of your diver. You then route the cable from the strobe forward so that the optical sensor that triggers the strobe is facing towards the camera.

Once connected up, the strobe attached to the model will fire light backwards illuminating anything behind the diver. This not only illuminates the area of the wreck in the background but also has the added benefit of ‘popping’ the diver out of the background. It only really works with strobes, however – if you want to use video lights, you’re better off getting the model to hand hold the light and simply point it backwards.
"To shoot an eye-catching image of a diver inside a shipwreck, you’ll want to separate the diver from the background."
TIP #8 - Models add connection
You always dive with a buddy, right? Well it’s time to put them to work by press-ganging them into being models!

Models really come into their own when shooting wrecks for a number of reasons. For starters, they’re great for adding a sense of scale to your shots. It can be difficult to judge the size of anything underwater so adding a diver into your shot gives the viewer something relatable – a baseline that they can use to judge the size of a wreck feature next to something that is a known quantity. In this case, a human being. Imagine shooting an image of a large prop. How big is it really? For the viewer, it’s difficult to judge without some baseline to work with. Stick a diver next to it, however, and its scale is immediately apparent!

Models can also be very useful for guiding the viewer's eyes to the area of interest you want them to focus on, particularly if they also happen to be using a powerful dive light. Inside the engine room of a shipwreck, for example, you might get your model to shine their torch on a set of dials or other detail that the viewer may not immediately notice. It’s important that the models interact with the environment too – there’s nothing worse than a model that ignores their surroundings and looks dead eyed into the camera!

Models also add interest to a shot as they give the viewer a connection to the photo. Photography is visual storytelling and a good photo feeds our natural curiosity - we’re drawn into any photo that has a diver in it which is why you’ll rarely see a shipwreck photo in a dive magazine that doesn’t feature a diver somewhere in the frame. Magazines understand the psychology of what images draw their readers in.
"Photography is visual storytelling and a good photo feeds our natural curiosity"
TIP #9 - Think different!
Unless you're one of the fortunate few that gets to dive previously unknown shipwrecks, there's a good chance that you're not the first photographer to capture photos of your favourite wreck. In this day and age of low cost action cameras, websites like Instagram are awash with photos of regularly visited 'tourist' shipwrecks.

Whilst it may be tempting to 'Google' your favourite shipwreck and simply copy any images that capture your eye, where's the fun in that? Copying someone else's photo requires no creativity - you're just mimicking another photographer's creativity. If you really want your photos to stand out from the crowd (and maybe even win awards), you need to offer something different. And to do that, you need to THINK different.

When planning a dive, I will often look at other photographers’ work but from the perspective of how I would put a fresh spin on the same subject – this could be as simple as framing the subject from a slightly different angle, getting in closer, pulling back or maybe even shooting using a technique like close focus wide angle to exaggerate perspective. The key is to think outside the box.

Then there's the subject of lighting. Most photographers tend to restrict themselves to flat, forward-firing lighting from strobes attached to their cameras - utilising off-camera lighting instead can completely change the feel of a commonly photographed subject, giving it a much-needed fresh spin. Creative lighting is perhaps the most effective way of shooting an image that really stands out from the crowd.
TIP #10 - Plan ahead!
We only have a limited time underwater so it’s important to do a little research before you giant stride off the back of the boat. It’s worth taking time to get familiar with the layout of the wreck in advance so you know where the more interesting – and photogenic - parts of the wreck are located. The internet can provide real insight from divers who have already visited a wreck – what’s worth shooting, what others have missed and what’s best avoided.

Be realistic in your planning. If you’re unable to cover the entire wreck in a single dive, focus on the areas of the wreck that are unique or instantly recognisable and plan in advance how best to get the shots you want. This is particularly true on deeper wrecks where bottom time will be limited.

Finally, discuss what you want to achieve with your dive buddies as you'll want them to be on the same page as you when you're trying to capture images underwater. Communicating underwater is difficult at the best of times so it's worth agreeing upon signals you'll use to direct your models. I use specific hand signals to position my models (up, down, left, right, spin left, spin right etc), to direct where I want them to look, where I want their torch pointing and so on - they need to know these before we hit the water.
All content © Jason Brown 2010-2026
No content may be reproduced without express written permission.